Back to School Label Name Animal Giraffe: A Versatile Digital Asset for Your Projects
Whether you are preparing classroom materials, launching a small product line, or organizing a creative workflow, having the right digital assets can save hours of repetitive work. The Back to School Label Name Animal Giraffe is a ready-to-use design that comes in a full suite of file formats: AI, EPS, SVG, DXF, JPG, and PNG. Each format is rendered at a canvas size of 1920 × 1280 pixels, giving you a consistent base for editing, scaling, and output. This article walks through how this asset fits into real-world processes, from initial planning to final production, and how you can integrate it smoothly into your own work.
What the Design Is and Where It Belongs
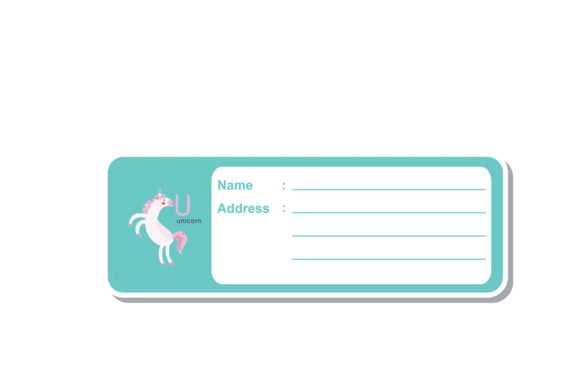
At its core, this design is a graphic element that combines a giraffe motif with a label area intended for a name or short text. The “Back to School” theme suggests classroom or organizational use, but the asset itself is format-agnostic. Because you receive it in both vector (AI, EPS, SVG, DXF) and raster (JPG, PNG) formats, you can use it in virtually any modern creative or production pipeline. The 1920 × 1280 pixel canvas is large enough for print at moderate sizes (e.g., a 6″ × 4″ label at 300 DPI) and also fits well on digital screens for web or social media use.
This design is not a finished product; it is a template or component that you customize and combine with other elements. Think of it as a building block that can appear in a sticker sheet, a locker tag, a welcome sign, a name badge, a product label, or a printable activity. Because the giraffe is a friendly, recognizable animal, it appeals to children and adults alike, making it suitable for educational brands, daycare centers, party printables, or small business merchandise.
Before the Project Starts: Planning and Preparation
When you are in the planning phase, the availability of multiple file formats helps you decide which tools to use. For instance, if you plan to cut vinyl stickers with a Cricut or Silhouette machine, the DXF and SVG files are your go-to choices. If you need to edit colors or typography in Adobe Illustrator, the AI file gives you full layer control. The JPG and PNG files are useful for quick mockups, proofing layouts, or sharing with clients who do not have design software. Having all formats upfront means you can build your workflow around the asset rather than retrofitting it later.
During preparation, you can also assess the canvas size. At 1920 × 1280 pixels, the design is wide enough for banner-like compositions but can be cropped or resized without losing quality in vector formats. If your final output requires a different aspect ratio (e.g., square labels for notebooks), you will want to plan the modifications ahead—adjusting the giraffe placement and text area before duplicating for mass production.
During the Project: Execution and Customization
Once you are actively working, the design becomes a time-saver. Open the AI or EPS file in your vector editor, and you can immediately edit the label text, change the giraffe’s colors to match your brand palette, or rearrange elements. Because the canvas is already set, you can focus on content rather than starting from a blank document. For batch production—such as creating 30 personalized name tags for a class—you can use tools like Illustrator’s “Data Merge” or Inkscape’s “Import” features to populate the label with names from a spreadsheet. The consistency of the base design ensures that every tag looks uniform.
If you are working with a laser cutter or vinyl plotter, the DXF and SVG files import cleanly into software like LightBurn or Cricut Design Space. You can scale the design to the physical size you need, align the cut lines with the artwork, and run the job without manual tracing. The giraffe’s shape is already optimized for labels, so the cut path is logical and avoids overly complex curves that could cause issues.
After the Project: Archiving and Reuse
When your project is complete, the design remains useful. The vector files (AI, EPS, SVG) can be archived as part of a digital asset library, making them easy to find for future seasonal updates or new product variants. The JPG and PNG exports from your final edits serve as previews for portfolios, e‑commerce listings, or social media posts. You might also save a layered version of the AI file with your own customizations, so next year you only need to update the text and re-export. This reuse cycle is where the real efficiency gain occurs—one design purchase can support dozens of projects over time.
Integration With Other Tools, Platforms, and Methods
This design interacts well with common creative ecosystems:
- Vector editing software (Adobe Illustrator, CorelDRAW, Affinity Designer, Inkscape): The AI and EPS files open with full editability. You can modify colors, add effects, or combine the giraffe with other elements.
- Cutting machine software (Cricut Design Space, Silhouette Studio, Brother ScanNCut): Use the SVG or DXF for instant cut‑ready paths. No need to trace or convert.
- Print on demand platforms (Printful, Printify, Redbubble): Upload the PNG with a transparent background for t‑shirts, mugs, or totes. The 1920 × 1280 px size fits many standard print areas.
- Web and social media (Canva, WordPress, Instagram): The JPG and PNG can be dropped into templates directly. If you use Canva, you can upload the SVG for scalable vector elements on posters or stories.
- Office software (Microsoft Word, Google Docs, Publisher): Insert the PNG or JPG into name tags, newsletter headers, or school notices. The size is manageable and prints clearly at letter‑size resolution.
By having all formats ready, you avoid format conversion steps that often degrade quality or introduce errors. The single canvas size also means you know exactly how much space the design occupies, which simplifies layout planning across different tools.
Choose the Right Format for the Task
Not every format is optimal for every job. For example, if you are cutting stickers, DXF or SVG is best because they contain vector outlines. If you are sending a proof to a non‑designer client, a high‑quality PNG with a transparent background is safer—they cannot accidentally move or delete elements. If you anticipate heavy editing (changing the giraffe’s neck angle, adding new text fields), start with the AI file to preserve layers. Keep a “master” file in a vector format and export other formats only when needed.
Scale With Intention
The canvas is 1920 × 1280 px, but vector files have no inherent resolution. When you scale up for large print (e.g., a 24″ × 16″ poster), verify that any bitmap elements (if present) are replaced with vectors. The provided JPG and PNG are raster, so they will pixelate if enlarged beyond their native size. For maximum flexibility, always do your scaling inside the vector file before rasterizing.
Organize Your Assets
Create a folder structure that separates original files from edited versions. For example: Original Design (containing the AI, EPS, SVG, DXF, JPG, PNG as downloaded), Edits (your customized AI/SVG files), and Outputs (final JPG/PNG for web, print PDFs, cut files). This habit prevents confusion when you return to the design months later. Name files consistently, such as giraffe_label_template.ai and giraffe_label_batch1_sarah.png.
Batch Customization Efficiency
If you need 30 unique labels, do not edit each one manually. Use data‑merge features in Illustrator or InDesign: prepare a CSV with the names, link the text field in the design, and generate all files in one operation. For cutting machines, you can duplicate the design on a single mat and assign different colors or names using the software’s text tools. The uniformity of the base design makes batch processing reliable.
Maintaining Consistency and Quality Control
When using the design across multiple outputs, consistency matters. Check that the label text area remains centered and legible after you change fonts or text sizes. In vector files, ensure that any outlines (strokes) are expanded if you plan to cut them, or keep them as strokes if printing. For print runs, do a test print on plain paper first to verify colors and alignment. Since the canvas size is fixed, your export settings should match the intended medium: 300 DPI for print (yielding a 6.4″ × 4.27″ print area) and 72 DPI for web. The PNG file you receive is likely at 72 DPI by default, so for print, export from the vector source at full resolution.
Long‑Term Use and Reusability
This asset is not a one‑off. You can rebrand the giraffe for different seasons: add a pumpkin for fall, a heart for Valentine’s Day, or a graduation cap for end‑of‑year. Because the design is simple and well‑proportioned, it can be recolored to match any palette without losing its charm. Store the editable vector file in a version‑controlled folder (e.g., Google Drive or Dropbox), and note any customizations you applied so that next year you only need to update the text. Over time, this design becomes a reliable component in your personal or business asset library, reducing the need to start from scratch each semester or product launch.
Useful Observations for Different Audiences
- Teachers and educators: Use the design for desk name tags, cubby labels, or classroom door signs. The giraffe theme works well for animal‑themed classrooms. Print on cardstock and laminate for durability. The SVG can be used with a Cricut to cut vinyl letters directly on the label area.
- Small business owners and entrepreneurs: Create personalized products like custom notebooks, water bottles, or tote bags. The design’s neutral background (transparent PNG) makes it easy to place on product mockups. Sell batches of personalized giraffe labels as a back‑to‑school bundle.
- Freelance designers and creators: Offer the label design as a digital template on Etsy or Gumroad. Because you have the source files, you can create variations (e.g., different animals) and sell a full set. The consistent canvas size simplifies product listings.
- Hobbyists and parents: Make unique items for your own children: locker tags, lunchbox labels, or scissor‑cut paper decorations. The DXF file is great for hobby laser cutters who want to make wooden name plaques.
- Marketers and bloggers: Use the design for printable promotions, social media graphics, or opt‑in freebies. The JPG version works directly in Instagram or Pinterest templates, while the SVG can be resized for billboards or flyers without quality loss.
Final Practical Integration Steps
To integrate this design into your workflow today:
- Download all files and place them in a dedicated folder with clear naming (e.g.,
BackToSchool_Giraffe_Label). - Open the AI file in your preferred vector editor. Review the layer structure: there should be a giraffe layer, a text/ label area, and a background layer. Turn off any layers you don’t need.
- Customize the label placeholder with your desired text, choose a font that matches your brand, and adjust colors. Save a copy as a template (e.g.,
GiraffeLabel_Template.ai). - Export needed formats: SVG for cutting, PNG with transparency for web, PDF for print. Use the canvas size as a reference, but scale as required for your output. For print, aim for at least 300 DPI.
- If producing multiple items, set up a data merge or use the duplicate function in your cutting software. Test one unit before scaling.
- Archive the final output files and the editable master for future edits. Document any changes (e.g., color hex codes, text variations) in a simple read‑me file.
By following these steps, you turn a single design purchase into a repeatable, time‑saving part of your workflow. The Back to School Label Name Animal Giraffe is not just a graphic—it is a process enabler that fits into planning, execution, and reuse across projects, tools, and audiences.